Creating custom T-shirts is a fun, creative, and potentially profitable hobby. If you’re a beginner looking to dive into T-shirt design, you’ll need to familiarize yourself with a few essential tools, techniques, and tips. In this article, we’ll cover the basics of designing T-shirts, choosing the right equipment, like auto heat presses and vinyl cutters, and finally, how to sell your products once you’re ready.
Why Start Designing Custom T-Shirts?
Custom T-shirt creation allows you to express your creativity, whether you want to make personalized designs for yourself, friends, family, or customers. For many, it starts as a hobby but can easily turn into a side business. In today’s world of personalized fashion, people love unique, custom-designed T-shirts for special events, gifts, or just as personal statements. And thanks to modern equipment like auto heat presses and vinyl cutters, it’s never been easier to start creating professional-quality designs right from your home.
Essential Equipment for Creating Custom T-shirts
1. Auto Heat Press: A Must-Have for Beginners
An auto heat press machine is a key tool in T-shirt designing, allowing you to easily transfer your custom vinyl designs onto fabric. Brands like HTVRONT offer a variety of options, including beginner-friendly machines. An auto heat press ensures consistent pressure and heat distribution, making your designs look professional. Look for features like adjustable pressure, temperature control, and safety features when choosing your press.
HTVRONT’s heat presses, for example, come with auto-pressure adjustments, ensuring that the vinyl is applied evenly to the fabric, and include safety mechanisms like overheating protection. These presses are easy to use and ideal for beginners since they come with easy-to-follow instructions and pre-sets.
Benefits of Using an Auto Heat Press:
- Efficiency: They reduce the time needed to apply vinyl compared to traditional methods like ironing.
- Consistency: Uniform heat and pressure mean your designs will adhere properly every time.
- Ease of use: Auto heat presses do most of the work for you, so you can focus on your designs.
2. Vinyl Cutters: Precision Cutting for Custom Designs
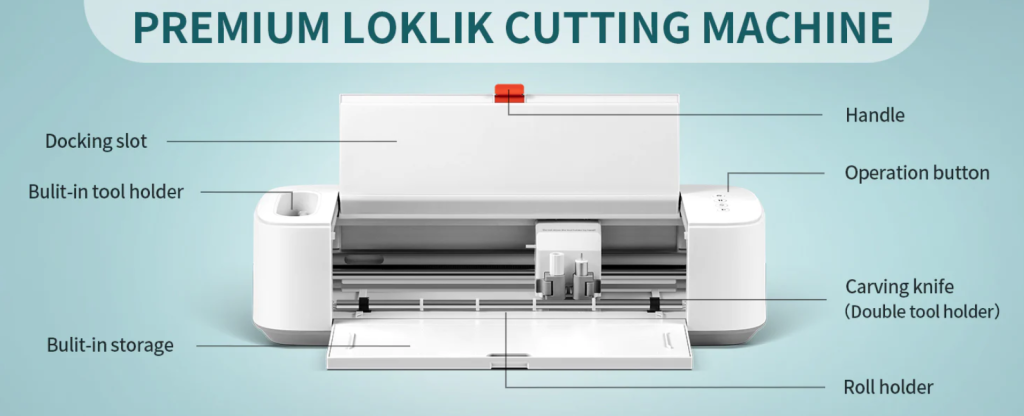
A vinyl cutter is another essential piece of equipment, that allows you to create intricate and precise designs. The LOKLiK brand is one of the most popular choices for beginners and professionals alike. These machines are user-friendly and compatible with a wide range of materials, including heat transfer vinyl (HTV), which you’ll use to transfer designs onto T-shirts.
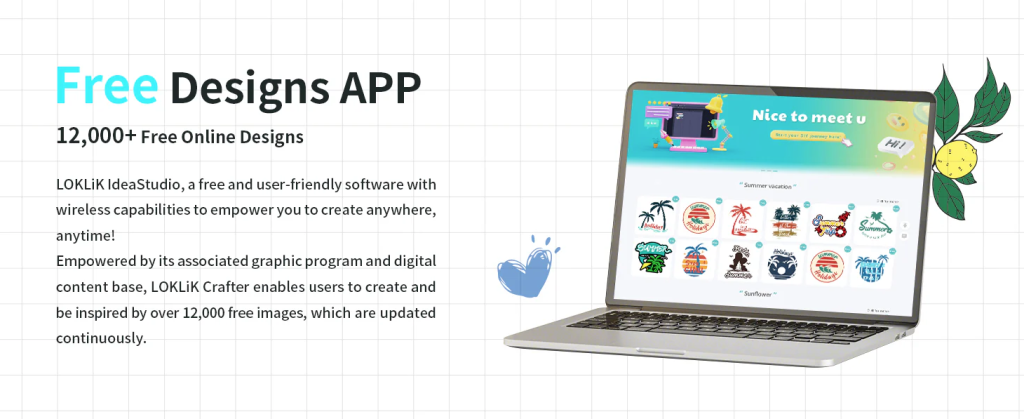
The LOKLiK IdeaStudio software, which comes with LOKLiK machines, allows you to create custom designs easily. You can use pre-designed templates or upload your own graphics in various formats such as SVG files. Once your design is ready, the vinyl cutter will automatically cut it out from the vinyl sheet with precision.
Features to Look for in Vinyl Cutters:
- Multi-material compatibility: Look for cutters that handle different types of vinyl and materials.
- Software integration: LOKLiK’s IdeaStudio software is known for its user-friendly interface, perfect for beginners.
- Cutting speed and accuracy: The faster and more precise, the better, especially for detailed designs.
Step-by-Step Guide: Creating Custom T-shirts
Now that you know about the equipment, here’s how to create your first custom T-shirt, step by step:
Step 1: Create or Choose a Design
First, decide on your T-shirt design. You can create your own artwork using graphic design software or use LOKLiK IdeaStudio which offers templates and ready-to-use designs. If you’re not familiar with graphic design, plenty of online resources offer free SVG files that you can use.
Step 2: Load the Vinyl into the Cutter
Once your design is ready, it’s time to load your HTV into the vinyl cutter. For beginners, starting with a basic heat transfer vinyl is a good idea. Make sure to place the vinyl shiny side down on the cutting mat. Adjust your machine settings for vinyl cutting (your cutter’s software will guide you through this).
Step 3: Weeding the Design
After the vinyl cutter has finished cutting, you need to “weed” out the excess vinyl, leaving only your design on the backing sheet. This step may seem tedious, but with practice, it becomes second nature. Weeding tools are helpful here, allowing you to remove small bits of vinyl from intricate designs.
Step 4: Position the Design on the T-Shirt
Once your design is ready, carefully position it on the T-shirt. Make sure it is centred or placed exactly where you want it. Some crafters use rulers or guides to ensure perfect placement.
Step 5: Use the Auto Heat Press
Now, the fun part! Set your heat press to the appropriate temperature and time based on the type of vinyl and fabric you use. Most heat transfer vinyl requires a temperature between 150-160°C for about 10-15 seconds. The HTVRONT auto heat press will make this step easier with its automatic pressure adjustments. Place the T-shirt and vinyl into the heat press, and wait for the magic to happen.
Step 6: Peel Off the Protective Layer
After pressing, allow the vinyl to cool for a few seconds before peeling off the protective clear backing. Voila! Your custom-designed T-shirt is complete.
Tips for Success
- Start with simple designs: While it can be tempting to jump into complex patterns, starting with basic shapes and text will help you learn the process without getting overwhelmed.
- Invest in quality materials: High-quality vinyl and T-shirts will result in better-looking and longer-lasting designs.
- Practice makes perfect: Don’t be discouraged if your first few T-shirts don’t turn out perfectly. T-shirt design is a skill that improves with time.
- Experiment with vinyl types: Explore different types of vinyl such as glitter, holographic, or flocked HTV to give your designs a unique flair.
Selling Your Custom T-Shirts
Once you’ve got the hang of creating T-shirts, you might want to start selling them. Here are some ideas on how to get started:
1. Online Marketplaces
Platforms like Etsy, eBay, and Shopify allow you to reach a broad audience. Etsy is particularly good for selling handmade or custom products like T-shirts. Shopify offers tools to create your own e-commerce website, which can give you more control over your brand and sales process.
2. Social Media
Use Instagram and Facebook to showcase your work. These platforms are visually oriented, which makes them perfect for showing off your T-shirt designs. You can create a business profile to separate your personal account from your brand. Use targeted ads and hashtags to reach a wider audience.
3. Local Markets and Events
Consider selling your T-shirts at local craft fairs, markets, or pop-up events. These venues offer a personal touch and allow potential customers to see and feel your designs in person.
4. Custom Orders and Collaborations
Offering custom T-shirts for events, such as birthdays, bachelorette parties, or company branding, can be a lucrative venture. You can also collaborate with influencers or local businesses to promote your designs and gain more exposure.
Final Thoughts On Creating Custom T-shirts
Starting a T-shirt design business or hobby can be a rewarding creative outlet. With the right tools like an auto heat press from HTVRONT and a vinyl cutter from LOKLiK, you can produce professional-quality custom T-shirts right from home. Whether you’re creating for fun or profit, remember that practice and creativity are key to mastering the craft.
If you’re interested in getting started, check out HTVRONT for heat presses and supplies, and LOKLiK for vinyl cutters and design tools. Good luck, and happy designing!
Ladies, we would love to hear about your crafting stories, so leave a comment below and let us know all about your creations. Do not forget to subscribe to our weekly newsletter, to keep updated and go into our monthly giveaways. There are more great Crafting Articles on the way!


